Saturday, August 24, 2013

Elisa's Pioneer Dress

 I bought this light maroon colored fabric at Joanns on super-duper clearance (like $1.50/yd) and I after working with it, I can see why it was on clearance.  Cheap, cheap fabric! Thin, wrinkly, and stiff.  Oh well.  A costume is about all it was good for.
When I went to cut this fabric, I didn't really have any plans; I just started making a dress and paired it with some lace and trim I thought looked good with it.  When I finished the dress, I thought it looked plain and old-fashioned, so I decided it definitely needed a little bonnet to complete the pioneer look!  I found a free, easy pattern here.  I have fun dressing her up in her little dress and bonnet, but alas, she is not quite ready for the dress up/imagination stage yet.  At the very least we have a back-up costume for Halloween!


Thursday, August 8, 2013

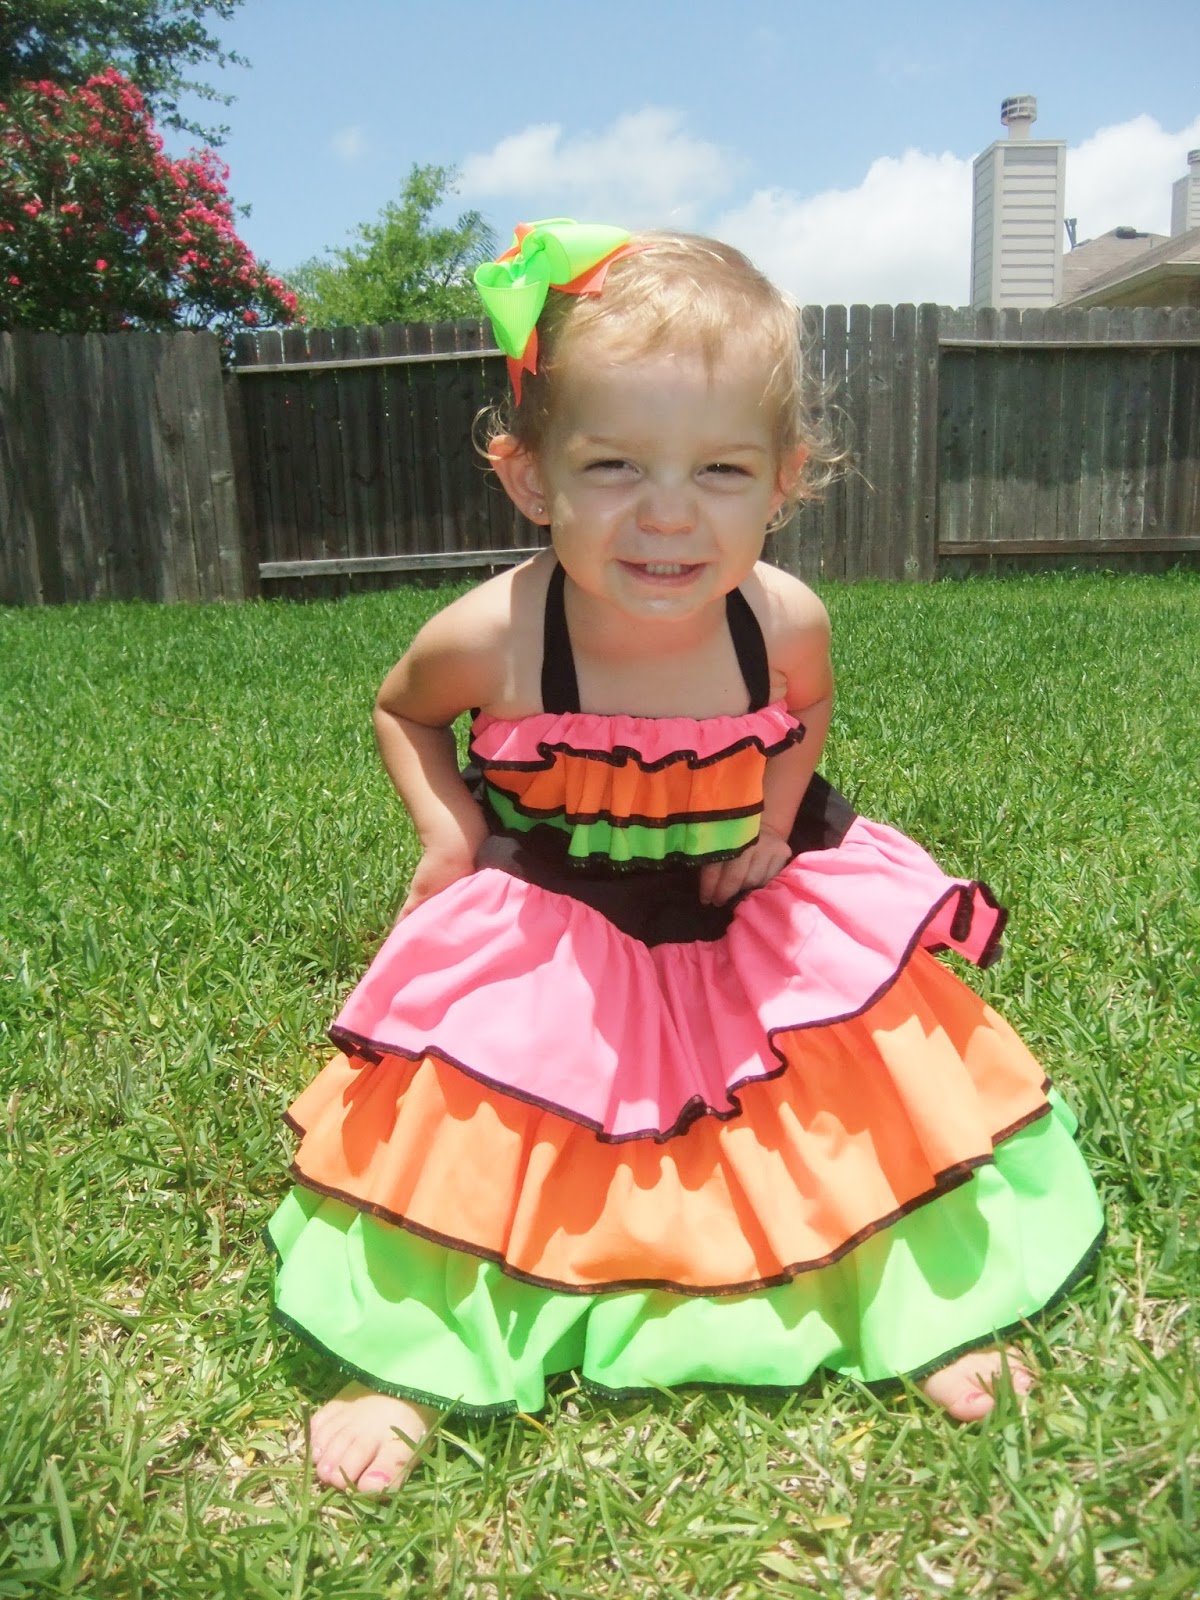
Flamenco Dress

 This is definitely one of Elisa's more daring dresses I've made!  It took some adjustments and re-adjustments until I decided it was good enough. I found this neon fabric at Joanns and thought it super fun and unique!  I thought black would be very striking paired with the neon colors.  I had no solid plans before starting on this project...it just came to be! 
I really love how the skirt turned out.  For the first round, however, I didn't care for the top.  You can't see too well in the photos, but it was just a mess.  I like the idea I had of the ruffles wrapping around the top diagonally, but--thanks to poor planning--the execution was bad.  It it didn't ruffle enough around her right shoulder so it laid funny.  Also I didn't have enough fabric leftover to make bias tape so I just cut strips on the straight grain.  I knew better, but I didn't have much choice.  And of course it sat weird and didn't contour with the curves like bias tape would.  


 So I unpicked it all and made just a straight ruffle across the front instead.  I don't really like how the pink layer flips up but it's not that big of a deal to me so I'm not going to go back and fix it!  Isn't she darling in her dress?!  She sure gets a lot of attention when she wears it!


Sunday, July 21, 2013

The Boo! Pinny

I came across this adorable pattern via Pattern Revolution and I loved its beauty and versatility--both pattern-wise and wearing-wise!  When I saw all the beautiful pinafores made using the pattern, I was determined to make one myself!  I love all of the patterns this Australian designer makes!
When I first downloaded the pattern, I was a bit put-off since it didn't have any actual patterns to cut out and pin! It is a chart of measurements for the needed pieces, and now that I have it all figured out (I was REALLY confused at first!), I'm convinced that that is the BEST idea ever! I love not having a ton of tiny pattern pieces floating all over the room.  One sheet of paper is all that is needed for this pattern!
The tutorial is awesome and the directions are clear.  The pinny doesn't take too much time to put together.  That is, if you don't make it with flutter sleeves and a tie-back straps with a loop like I did.  I think the sleeves just make the pinny though!   I also love that the inside is just as pretty as the outside, thanks to all the binding techniques used in the pattern.   
I've entered my version of the pinny in the contest--but I probably won't win as I don't have professional pictures (I really need a decent camera!) or a mannequin to model it--but there's always hope! Elisa's version includes a double-layer flutter sleeve and the bodice displays some quilted scraps (I sure was happy to find a use for them! Yay!).  I love the fabric colors in Elisa's--so girly--but the touch tan in it keeps it from being nauseatingly so.
Here is Elisa's:


I made another one for my niece, Aaliyah, for her 2nd birthday.  I made it pretty similar to Elisa's except it is slightly shorter and uses the bow-tie option instead of quilted scraps.  I love the way this one turned out too!  Blue on little girls is so pretty!


Friday, July 19, 2013

"Stella" One-Shouldered Dress

Making this dress was probably the strangest experience on a sewing project I've ever had!  Because at first, I didn't' like the pattern...at all.  I just didn't like the look of it.  It was one of the patterns included in the giveaway loot I won from Violett Field Threads. 
But, being the fan of variety that I am, I decided to give it ago and add something new to Elisa's wardrobe (lots of halters but no one-shouldered anything!).  I bought the fabric at Hobby Lobby (of course).  I picked out this fabric because I wanted a dress to match one of Elisa's bows.  Most of the time bows are made to match a dress- well, I make dresses to match bows! It was a fairly straight-forward pattern to follow, but I skipped a lot of unnecessary steps.  I tried it on Elisa and decided I still didn't like it, mostly due to the fact it was a bit big on her.
Well, a couple of moths went by with the dress sitting on a heap in her closet floor on top of all of her other clothes I need to sort/giveaway.  I don't remember why I brought it out again but I'm sure glad I did!  I think the fact that she grew a little helped a lot in it's appeal.  Now I love this dress on her, and she always gets compliments in it.  I don't know what I was thinking, not liking it! She actually wears this dress now quite a bit (comparatively speaking).  It's not church-appropriate but it sure is darling on her! I love the sash to; it was optional but I wouldn't make this dress without it!  Her is the cutie modeling her one-shouldered "Stella" dress!


Thursday, July 18, 2013

4th of July Dress(es)

 I know this sounds crazy (since I'm obsessed with sewing and all), but I originally wasn't planning on making a 4th of July dress.  I just don't like spending a lot of time and money on something Elisa wears just once.  And you'd think with the shop I would have jumped on the idea of making 4th of July dresses...but, no.  Maybe I'm just plain lazy!? 
I saw some blue chevron at Hobby Lobby and bought it on a whim, and paired it with red-and-white heart-patterned fabric.  I came up with this dress (made from a modified pattern).  I really liked the way it turned out--very traditional looking and cute!  I thought I would try selling it first and if it didn't sell, it was no loss to me; Elisa could wear it.  Well, it sold quickly and I admit I was happy that it sold, yet sad to see it go!


 I went back to H.L. and bought more of the same fabric, because I liked the first dress so much!  I didn't want a halter top this time (I've decided Elisa has WAY too many!) and I wanted a shorter dress.  The bodice turned out as planned (though I forgot to account for Elisa's tiny shoulders so the straps are a bit big) but the skirt...nope.  The skirt came about from my stupidity (which obviously turned out great in the end!).  I wanted the blue chevron just to be gathered like a normal skirt and have a red ruffle around the hem.  Well, I accidentally cut a huge diagonal with my rotary cutter through the red fabric! Oops! So I improvised and came up with this instead.  Really, it's a miracle it worked out so well! I will try not to do such stupid things in the future, but then again, it all worked out in the end.  Elisa was a big hit in her dress!  Those red boots are just irresistible!


Wednesday, July 17, 2013

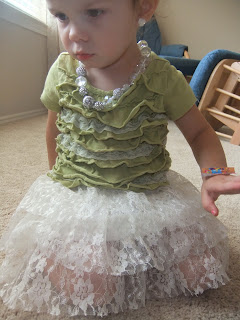
Layered Lace Skirt + Necklace

 Here is a pretty simple and simply pretty skirt that I whipped up a couple of months ago (okay, more than a couple of months ago--how about half a year ago!).
 I LOVE making skirts (Elisa's closet can attest to that!) and I'll tell you why:  They're easy.  They're quick.  They've got growing room. They require little fabric, which means they're cheap (my favorite part!) and of course, they're adorable (my other favorite part)!
There was nothin' to this skirt.  3 layers of slightly gathers lace which I found at Goodwill (for at most a couple of bucks) sewn onto a piece of white scrap fabric.  Sewed it up, made a casing, and put in the elastic.  Easy.  I like that the lace hangs over the lining just a bit as to get that see-through, elegant look.  I also like that the lace is a slight off-white and not a stark, blaring white--it matches a lot of her shirts!  And I mentioned previously that I made it 6 months or so ago.  Still fits!  I love this skirt--kinda tempted to make myself one!

Okay, one last thing: The necklace.  I know this blog focuses on mainly my sewing projects, but did you know I've been making jewelry since I was 12?  Yeppers, and now I get to make jewelry for my little girl and that makes me very happy!
 Chunky necklaces for little girls are the trend right now (I am obsessed with them so I hope it lasts for a long time!).  And I can't figure out why the craft stores haven't jumped on this trend and start selling the big beads in store--duh you'd think?!  So if I want to make Elisa a chunky necklace myself I have to order the beads online, which costs around $11/necklace (I am not interested in selling chunky necklaces so I don't want to buy in bulk which I'm sure would lower the cost per necklace significantly).  But I was at Hobby Lobby (surprise surprise!) a couple of months ago strolling through the jewelry section and this GORGEOUS strand of semi-chunky beads caught my eye, the sparkle and beauty pulled me in and the half-off price got me!  I bought some transparent ribbon (with a slight silvery tone to it) and pulled it through the beads with a knot in between each bead.  Sounds easy enough--if the beads had bigger holes--but unfortunately, I spent most of my time fiddling around trying to get the beads to go through the ribbon, but, I think it turned out perfect!   


Monday, July 15, 2013

Swing Top and Ruffle Bloomer Set

 This is my very first giveaway outfit!  I sure had a hard time giving it away...I seriously almost kept it for Elisa but I decided Elisa already has plenty of clothes and I didn't want to start all over again with another.   I made up this design with the help of a couple of patterns which I combined.  It sure was a hit on my FB page but I don't know if I could make it in another size!  It was shipped all the way to Canada!  I love this color combo; it's been my favorite for a very long time and it seems to be finally be in style! Luckily I used fabric I had already in my ever-shrinking stash and shipping was paid for so it wasn't too much of a loss, just time, but I had fun designing and making it!  Plus it is worth it when the receiver says this:  OH MY WORD!!!! you were not lying... that dress is AMAZINGLY CUTE!!! I LOVE LOVE LOVE LOVE LOVE it!!!!!!!!! eeeeekkkkk seriously you are awesome! matchs the headband PERFECTLY!!!!!! THANK YOU SOOOO MUCH...worth paying the shipping to get such amazing outfits :)