
My first quilt! When I tell people I sew clothes, they say "huh, wow, cool". But when I tell people I made a quilt...now that gets them going. It seems there is an entire quilting community that I didn't realize existed before completing my very first quilt. So I am now and henceforth a quilter. Okay I still like sewing clothes better, but I did have a fun time making my first quilt. Well not "my" quilt, I made it for my oldest son who loves Mario.
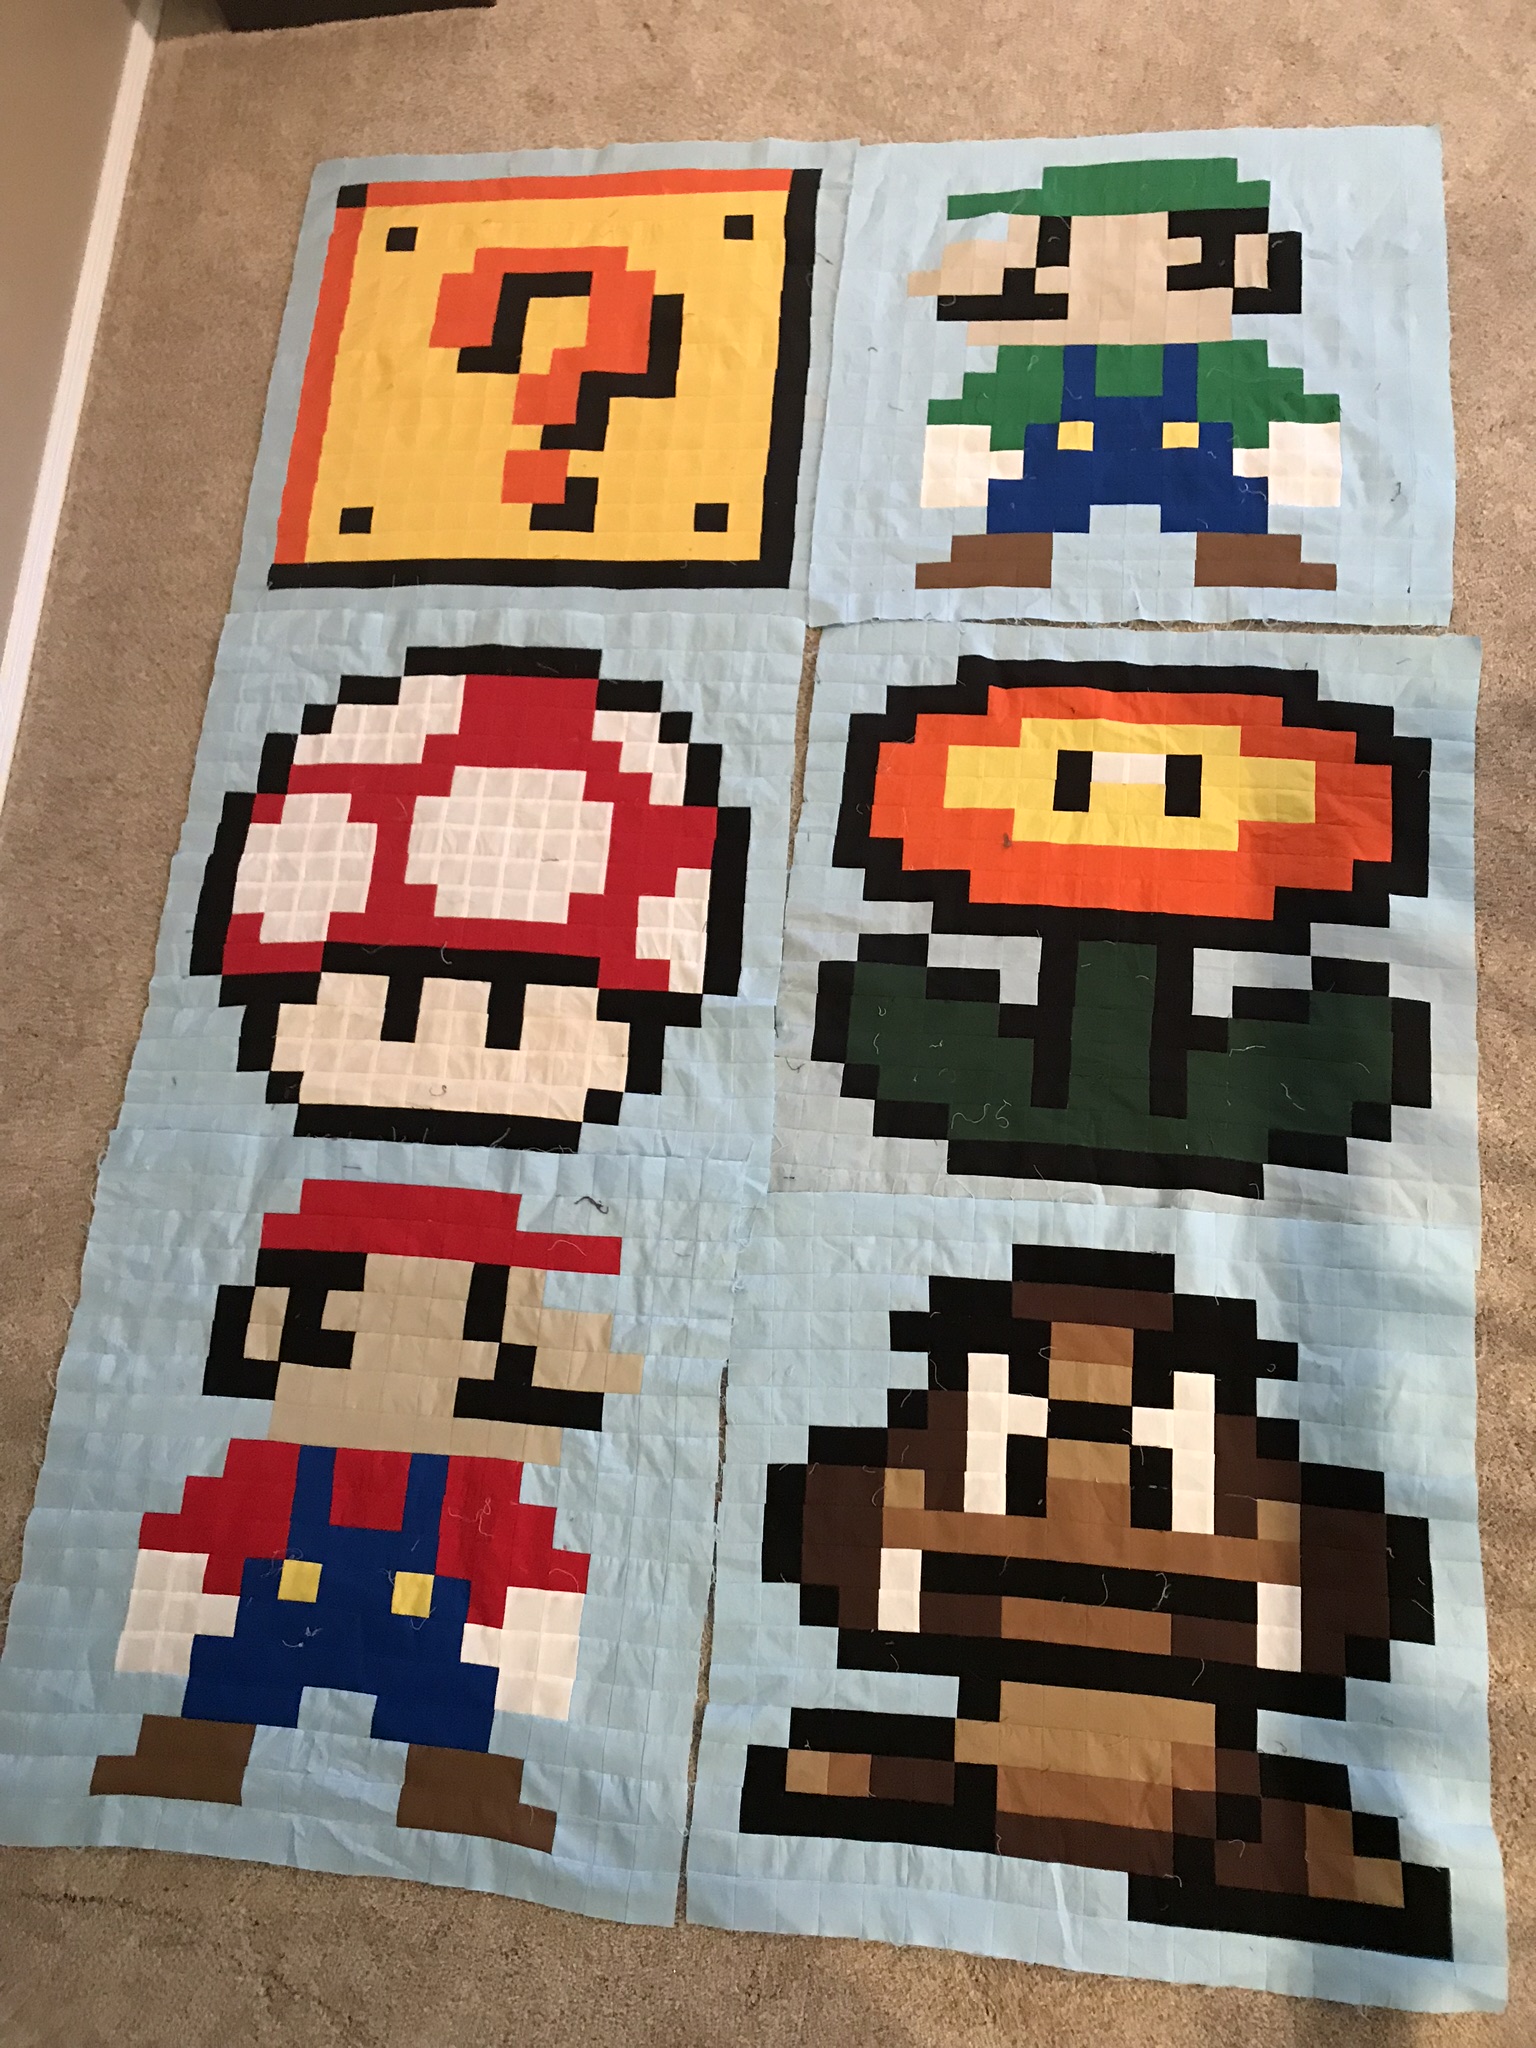
So this quilt took me a three-month span to complete start to finish. Not that I worked on it every single day. And I did get a few other articles of clothing sewn up in the meantime, but I worked on this quilt from October 2019 to December 2019. I don't recall the exact reason I started this quilt. The pattern I followed was simple enough, just blocks sewn together in rows and columns. I used hundreds of 2X2" squares and multiple trips to Walmart for more fat quarters. For future reference: I calculated that 1 fat quarter equals 80 2-inch squares. Good thing for a rotary cutter and a clear ruler! It did take so, so long to sew up all those squares, even though it wasn't exactly "hard" work. The pixilated Mario Bros. characters work nicely in quilt made of squares. I am sorry I do not know much quilting jargon. Maybe someday I will. Anyway, once I got all the characters made, it was time for the construction of the quilt. I didn't have much trouble until I noticed that some of the completed figures were getting wonky/wavy. I've come to the realization that grainline does matter, or at least consistency in following grainlines does, in a blocked quilt such as this. I cut the squares for Mario first, not bothering with which way the grainline went, and it is noticeably wonky compared to the other figures in which I did pay attention to the grainline (all going the same way). Another future reference/tip: the spacing strips need to be cut lengthwise (with the grainline) so there's minimal stretching/warping and more stability. That could be another reason this quilt turned out slightly wonky--I paid no attention to how I cut my spacing strips.
One of my biggest mistakes in making this quilting was using a fabric that not only was too stretchy to use in a quilt, but also to heavy. I chose to use it because it was wide enough that I didn't need to piece it but mostly because it was super cheap (only $4) and I didn't want to spend any more money than I already had. Hindsight, I should have because using the inexpensive fabric made for one heavy, wonky quilt. As for the actual quilting part, I did it all by machine. My machine has tons of quilting stiches. I choose a large loopy stitch using clear thread. It turned out just okay, the quilt was really heavy so it didn't pull through the machine easily, and not all my loops were even. Okay, not even close to being even haha. But it worked. I sewed the binding on by machine too. I guess that is not the "proper" way to do it. Well I ended up with a very imperfect, heavy quilt, but my son liked it enough. Besides it is still a cool quilt. I like it ok and I learned a lot.


My inspiration/ guide. I think either my squares were bigger or this is a bigger quilt.


All finished. I hate the wavyness at the bottom and lets not even look at the backside. I like the bold colors and pixelated characters.