Total price: abt. $5!
Thursday, April 26, 2012
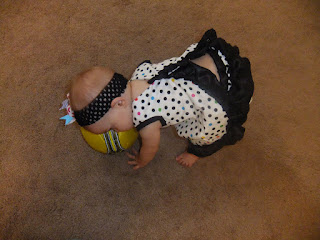
Pink and Zebra Sunsuit
Elisa is stylin' in this pink and zebra romper! It is made out of shiny polyester. I used the same pattern as the other sunsuit romper I made, I just altered it a tad bit so that it ties around the neck instead of straps that come over the back. The ruffles in the front were an after thought--I originally applique a zebra heart but I didn't like it so I took it out. I'm so glad I did because the ruffles in the front really make the outfit! I love the whole outfit-she looks like such a diva wearing it! I like that these sunsuits are so inexpensive to make. This is the only relatively similar item I could find on Etsy, and it's around $40, including shipping!
Wednesday, April 25, 2012
Pinafore Dress with Ruffle Bloomers
I LOVE this next little outfit! It is a pinafore dress with a ruffled diaper cover. I also love that it is very comfy for her and very easy for me to put on and off (it only has one snap in the back). Most importantly, I love how inexpensive this was to make! I bought this fabric at the thrift store, and it was only a couple bucks! She looks so sophisticated and classy in it! I love all the ruffles. I was inspired by this Etsy shop and used/altered this pattern. Super cute! Pinafore dresses are really quite easy to make!
Total cost: $3
I would have had to pay at least $50 for this if I were to buy one like it online! Can't beat that price!
Butterfly Tutu Onesie
I don't have too much to say about this outfit other than it's adorable and was pretty easy to make. It is an embellished onesie with a butterfly iron-on and sewn-in tutu. She looks super cute in it and gets lots of compliments whenever she wears it. I made the hair bow to go with it. I love all the sparkle and puffiness of this outfit! It is so girly.
Total cost: around $10 for the everything, and lots of leftover tulle!
Monday, April 23, 2012
Lil' Sailor Dress
I've seen a plethora of those pillow-case dresses on etsy and I've never been a fan. I just think they look...well, boring. Until I made this one!! I used this pattern. Okay, I strayed from the pattern and just did what I wanted to do with the dress. So, no sleeves. Lots of ruffles though! I wanted an additional layer of ruffle on the bottom of the dress but I ran out of blue fabric! Dang. This dress is quite easy to make, though adding the ruffles did take some time. I love having a serger! I'm sure that I have mention this fact multiple time already but I really do! I love using the rolled edge over-lock stitch. It saves so much time and makes the outfit look professional.
What I love most about this dress is that it was free to make! I used all leftover fabric. The white fabric I got for free (I still have about 8 yards left) and the blue fabric is leftovers from Gabe's pea-coat lining. The lining works great for the ruffle trim because it's very lightweight.
Here's the lil' sailor, complete with tattoos (she just happened to have big-bro's tattoos on while modeling this!):
Total Cost: $0
Monday, April 16, 2012
Ruffle Bottom Sunsuit
This next outfit has been my latest favorite thing to make Elisa! It's called a sunsuit; it's basically a romper. It looks like a swimsuit but it's not. Perfect for this hot AZ weather. And SO so cute!! These are plastered all over Etsy and priced between $18-$40, averaging $30. I've had my eye on these sunsuits and wanted to give them a try. I had been holding off because I didn't have a pattern and assumed I would have to figure it out from the diaper cover pattern I had, but luckily for me, this nice lady posted a free pattern AND tutorial!! Made my day when I discovered her site. Click here if you want to make one yourself. The instructions are clear and the pattern is right on (for a 12 month old).
These sunsuits are fun and fairly easy to make. Nothing too complicated. I really enjoyed making this. And I LOVE the fabric that I used!! I found it at Joannes and had to have it. It is so fun and bright and colorful! Just perfect for a little girl's wardrobe. She looks super cute in her new outfit:
Total Price? I'm not exactly sure, since I bought the fabric awhile ago, but I think it cost me probably around $5. But I have enough fabric left over to make 3 more of these!
Set Your Heart Ablaze
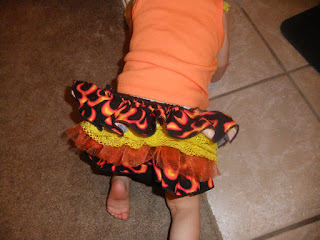
She sure does in this outfit! I've been drooling over these ruffle bloomers for a long time now, but didn't want to shell out the $30. Fortunately for me, these bloomers don't require that much fabric, and I already had a diaper cover pattern so I figured it wouldn't be too hard to figure out. It wasn't, but it sure was time consuming to put the ruffle on the butt. I put four layers: Cotton fire print, lace, tulle, and then another fire print. It was really fun to make, and after I got the ruffles on it really didn't take that long to put together. And the best thing? This bloomer was made entirely with scrap material so it didn't cost a dime to make! Plus I got to use up some old material that had been sitting around forever.
Many of the girls wearing these ruffle bloomers on Etsy have no top, and that bothers me. I know it is just for the pictures, but still. So of course Elisa needed a shirt to match, but she doesn't have a lot of orange and yellow in her wardrobe, so I picked up this orange tank top at Walmart for $2.50 and sewed some lace on the collar and fashioned some bows (took me about 10 mins), and there you have it, and adorable, unique, and inexpensive outfit!!
Many of the girls wearing these ruffle bloomers on Etsy have no top, and that bothers me. I know it is just for the pictures, but still. So of course Elisa needed a shirt to match, but she doesn't have a lot of orange and yellow in her wardrobe, so I picked up this orange tank top at Walmart for $2.50 and sewed some lace on the collar and fashioned some bows (took me about 10 mins), and there you have it, and adorable, unique, and inexpensive outfit!!
Total Cost: $2.50 for the entire outfit!
Friday, April 13, 2012
Zebra/Pink Cupcake Shirt
I've decided that Elisa's birthday will be cupcake-themed. So I was really excited when I came across this shirt at a boutique at the CA swapmeet:
I was not excited about the price tag:$15. Okay so $15 isn't that bad, but I wanted the diaper cover that went with it, which was yet another $15. So it would have added up to $30 for a birthday outfit...ehhh....way too poor for that. Besides, it looked simple enough, I decided to give it a go:$5 later...
a super cute outfit that was a whole lot of fun to make! Yes I did copy. And I am NOT ashamed of that!! That is what is so nice about being able to sew. It allows me to see something I like and make one for myself (or my girl) for a fraction of the price! That's what this blog is all about!
Wednesday, April 11, 2012
Easter Dress
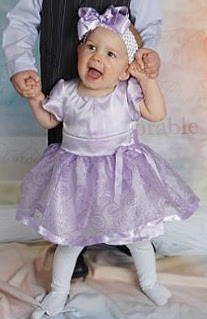
Here is Elisa's Easter dress! I actually made it a month or two ago. I bought the fabric at Joannes and used the same pattern as he Christmas dress. Which, speaking of, I am SO DONE with that pattern. Too many pieces to sew together. Yuck. But I think it turned out super cute. I love the glittery swirl fabric, but I do not love that the glitter comes off easily. Will NOT buy that fabric again. I make sure to hand-wash it so the glitter doesn't all come off at once, but all I have to do is touch it and it comes off! Bummer. I also made her a hair bow to match, which stars the glitter ribbon I got at Michaels. I think I paid no more than $10 for this dress. Cheap for a dress this cute! She wore it for her Easter portraits:
Total price: abt $10
Friday, April 6, 2012
Ribbon Butterfly Sleeve Tutorial
As promised, here is the tutorial for putting a ribbon sleeve on a plain onsesie. It is relatively easy and doesn't take too long.
You will need:
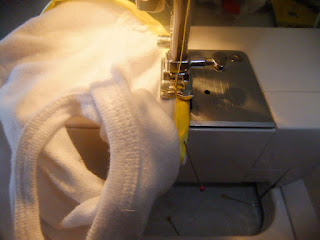
Step 2: This next step you will sew the ribbon on to seal the open edge of the armhole. Start at the underarm seam (this particular area you may have struggled with during the unpicking stage because there are 3 pieces that joined at that part). Take your 5/8" ribbon and fold it in half. This part is probably the trickiest: you will need to place the armhole edge flush against the fold of the ribbon, while keeping the back of the ribbon ever so slightly longer than the front, so when you are sewing (front side up) you will be sure to catch the back with it. Leave a bit of ribbon hanging over the underarm seam for good measure at the start and finish:
Pin the heck out of it, and then sew close to the ribbon's finished edge:
Make sure to back stitch at the beginning and end. This is how the end should look:
Step 3: This step you will be sewing the ribbon to make the butterfly sleeve itself. Cut your ribbon, about 7 inches or so. Sew a long/basting stitch and gather. The most important part of this step is making sure that both ribbons/sleeves are EVEN. So measure both sleeves/ribbon and make sure they are the same length and that the gathers are even:
Place and pin them UNDER the ribbon edge, taking care that the sleeves are even with each other. For the beginning and end of the sleeves, you'll want a nice curved edge. This is easy to do. At the start and finish (the cut ends) of the ribbon/sleeve's finished edge, move the finished edge of the 1 1/2" ribbon so that it meets with the 5/8" and makes a nice curved shape. I hope that made sense! You should have a little triangle of ribbon/sleeve hanging over in the inside, cut it off after you sew the sleeve on:
Sew close to the edge, and there you go! Super cute!
Helpful hints: I found that when I sewed the 5/8" ribbon on, the armholes jutted out too much for my liking. Just tuck them inside the onesie and sew them up in the side seams.
Also, since you cut that little triangle shaped piece off from when you made the sleeve curved, it left a raw edge on the ribbon. Raw edges on ribbon fray like crazy. Take a lighter and seal the raw edges of the ribbon; it's a good idea to do that on the ribbon in the underarm as well. Just don't set the onesie on fire, or yourself, or your house :). Sometimes it can get scratchy if you melt too much of the ribbon, so another alternative is using Fray Check.
There you have it! Now decorate the onesie till your heart is content. I added ruffles on mine:
You will need:
- Onesie
- Ribbon, 5/8 " width
- Ribbon, 1 1/2" width
- Seam ripper
- matching thread, scissors, etc...
Step 2: This next step you will sew the ribbon on to seal the open edge of the armhole. Start at the underarm seam (this particular area you may have struggled with during the unpicking stage because there are 3 pieces that joined at that part). Take your 5/8" ribbon and fold it in half. This part is probably the trickiest: you will need to place the armhole edge flush against the fold of the ribbon, while keeping the back of the ribbon ever so slightly longer than the front, so when you are sewing (front side up) you will be sure to catch the back with it. Leave a bit of ribbon hanging over the underarm seam for good measure at the start and finish:
Pin the heck out of it, and then sew close to the ribbon's finished edge:
Make sure to back stitch at the beginning and end. This is how the end should look:
Step 3: This step you will be sewing the ribbon to make the butterfly sleeve itself. Cut your ribbon, about 7 inches or so. Sew a long/basting stitch and gather. The most important part of this step is making sure that both ribbons/sleeves are EVEN. So measure both sleeves/ribbon and make sure they are the same length and that the gathers are even:
Place and pin them UNDER the ribbon edge, taking care that the sleeves are even with each other. For the beginning and end of the sleeves, you'll want a nice curved edge. This is easy to do. At the start and finish (the cut ends) of the ribbon/sleeve's finished edge, move the finished edge of the 1 1/2" ribbon so that it meets with the 5/8" and makes a nice curved shape. I hope that made sense! You should have a little triangle of ribbon/sleeve hanging over in the inside, cut it off after you sew the sleeve on:
Sew close to the edge, and there you go! Super cute!
Helpful hints: I found that when I sewed the 5/8" ribbon on, the armholes jutted out too much for my liking. Just tuck them inside the onesie and sew them up in the side seams.
Also, since you cut that little triangle shaped piece off from when you made the sleeve curved, it left a raw edge on the ribbon. Raw edges on ribbon fray like crazy. Take a lighter and seal the raw edges of the ribbon; it's a good idea to do that on the ribbon in the underarm as well. Just don't set the onesie on fire, or yourself, or your house :). Sometimes it can get scratchy if you melt too much of the ribbon, so another alternative is using Fray Check.
There you have it! Now decorate the onesie till your heart is content. I added ruffles on mine:
Subscribe to:
Comments (Atom)


