You will need:
- Onesie
- Ribbon, 5/8 " width
- Ribbon, 1 1/2" width
- Seam ripper
- matching thread, scissors, etc...
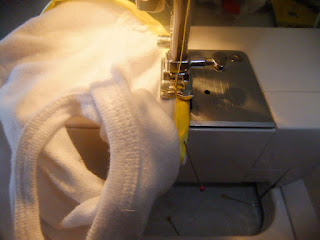
Step 2: This next step you will sew the ribbon on to seal the open edge of the armhole. Start at the underarm seam (this particular area you may have struggled with during the unpicking stage because there are 3 pieces that joined at that part). Take your 5/8" ribbon and fold it in half. This part is probably the trickiest: you will need to place the armhole edge flush against the fold of the ribbon, while keeping the back of the ribbon ever so slightly longer than the front, so when you are sewing (front side up) you will be sure to catch the back with it. Leave a bit of ribbon hanging over the underarm seam for good measure at the start and finish:
Pin the heck out of it, and then sew close to the ribbon's finished edge:
Make sure to back stitch at the beginning and end. This is how the end should look:
Step 3: This step you will be sewing the ribbon to make the butterfly sleeve itself. Cut your ribbon, about 7 inches or so. Sew a long/basting stitch and gather. The most important part of this step is making sure that both ribbons/sleeves are EVEN. So measure both sleeves/ribbon and make sure they are the same length and that the gathers are even:
Place and pin them UNDER the ribbon edge, taking care that the sleeves are even with each other. For the beginning and end of the sleeves, you'll want a nice curved edge. This is easy to do. At the start and finish (the cut ends) of the ribbon/sleeve's finished edge, move the finished edge of the 1 1/2" ribbon so that it meets with the 5/8" and makes a nice curved shape. I hope that made sense! You should have a little triangle of ribbon/sleeve hanging over in the inside, cut it off after you sew the sleeve on:
Sew close to the edge, and there you go! Super cute!
Helpful hints: I found that when I sewed the 5/8" ribbon on, the armholes jutted out too much for my liking. Just tuck them inside the onesie and sew them up in the side seams.
Also, since you cut that little triangle shaped piece off from when you made the sleeve curved, it left a raw edge on the ribbon. Raw edges on ribbon fray like crazy. Take a lighter and seal the raw edges of the ribbon; it's a good idea to do that on the ribbon in the underarm as well. Just don't set the onesie on fire, or yourself, or your house :). Sometimes it can get scratchy if you melt too much of the ribbon, so another alternative is using Fray Check.
There you have it! Now decorate the onesie till your heart is content. I added ruffles on mine:


Great way to embellish a onesie!
ReplyDelete